Hollyhock seeds are often overlooked by gardeners seeking vibrant blooms. Many struggle to find reliable information on how to grow them effectively. This lack of guidance can lead to failed attempts and disappointment. Without proper knowledge, seedlings may fail to thrive, leaving you frustrated.
The good news is that growing hollyhocks can be rewarding with the right approach. In this post, we will provide clear, step-by-step instructions on selecting, planting, and nurturing hollyhock seeds. With this information, you can cultivate a beautiful display of flowers that will enhance your garden and bring you joy.
Understanding Hollyhock Seeds
Hollyhock seeds come from the beautiful hollyhock plant. They are small, round, and usually dark brown. These seeds are essential for growing new hollyhocks. They can produce flowers in various colors, such as pink, white, and purple.
To grow hollyhocks, you need healthy seeds. Proper care will help them germinate and thrive. Knowing how to handle these seeds is the first step to a successful garden.
Types of Hollyhock Seeds
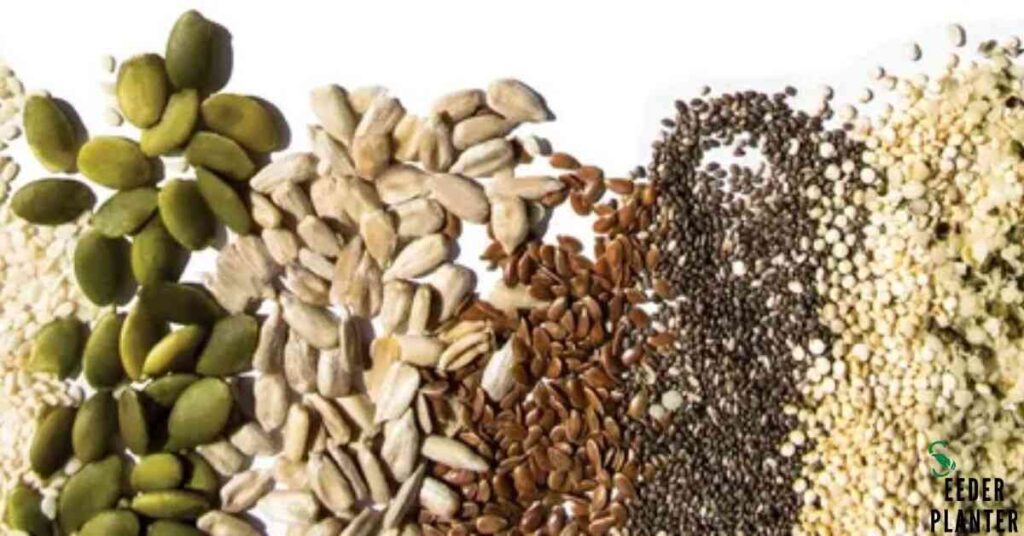
There are several types of hollyhock seeds available. Some are hybrid varieties, while others are heirloom seeds. Hybrid seeds may produce more blooms but might not produce seeds you can collect. Heirloom hollyhock seeds, on the other hand, allow you to save seeds each year.
They often have a richer history and can be passed down through generations. Choosing the right type of hollyhock seeds is important for your garden’s success.
When to Collect Hollyhock Seeds
Collecting hollyhock seeds is best done in late summer or early fall, around August to September 2023. By this time, the seed pods will be dry and brown. Carefully remove the pods from the plant. Open them to find the seeds inside.
Make sure the seeds are fully dry before storing them. Keeping them in a cool, dark place helps maintain their viability. This way, you will have healthy hollyhock seeds for planting in the next season.
Starting Hollyhock Seeds: Step-by-Step Guide
Starting hollyhock seeds is an exciting process. It begins with choosing the right method. You can start seeds indoors or sow them directly outdoors.
Each method has its benefits. Indoor starting gives you a head start, while direct sowing is easier for some gardeners. Following the right steps will ensure healthy plants. With patience and care, your hollyhocks will thrive.
Indoor Seed Starting
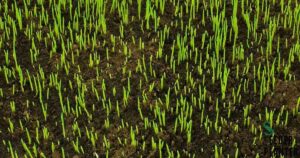
To start hollyhock seeds indoors, gather your supplies. Use seed trays and a light potting mix. Fill the trays with soil and moisten it. Place one or two hollyhock seeds in each cell. Cover them lightly with soil. Keep the trays in a warm area with good light.
Water gently to keep the soil damp. After a few weeks, you should see seedlings emerging. This method is ideal for starting in late winter or early spring 2023.
Direct sowing hollyhock seeds
Choose a sunny spot in your garden with well-drained soil. Prepare the soil by loosening it and removing weeds. Scatter the hollyhock seeds evenly over the area. Lightly cover them with soil, about half an inch deep.
Water the area gently to avoid washing away the seeds. This method works best in early spring or fall 2023. With the right conditions, your seeds will germinate and grow strong.
Caring for Seedlings
Caring for hollyhock seedlings is crucial for their growth. Once the seeds have germinated, ensure they get enough light. If they are indoors, use grow lights if needed. Water the seedlings regularly, but avoid overwatering. Make sure the soil is moist, not soggy.
You can also thin the seedlings to give each one space to grow. This will help prevent crowding and encourage strong plants.
Pricking Out Process
The pricking out process is essential for hollyhock seedlings. When seedlings have at least two true leaves, it’s time to move them. Carefully lift each seedling from the tray, avoiding damage to the roots. Transplant them into larger pots filled with fresh potting mix.
Space them a few inches apart to allow for growth. Water them gently after transplanting. This step helps strengthen the seedlings before they move outdoors.
Early Growth Care
Early growth care for hollyhock seedlings involves monitoring their environment. Keep them in a bright, sunny location. If outdoors, ensure they are protected from harsh winds and extreme temperatures. Continue to water them regularly, allowing the soil to dry slightly between waterings. Fertilize lightly every few weeks with a balanced fertilizer. This care will support healthy growth as the seedlings prepare to thrive in your garden.
Spring Tasks
As spring arrives, it’s the perfect time to plant hollyhock seeds. Make sure the soil is well-prepared by loosening it and adding compost. Plant the seeds about ¼ inch deep and water gently. Hollyhock seeds need sunlight, so plant them in a sunny spot.
Keep the area weed-free to help the seeds grow well. It’s a good idea to check for pests, as spring is when they start to show up. By starting in early spring, you’ll have beautiful blooms by the end of summer.
Summer Management
During summer, hollyhocks need extra care as the weather heats up. Water the plants regularly, especially during dry periods. Mulch around the base to help retain moisture and keep the roots cool.
Hollyhock seeds planted in spring should be growing well by now, so keep an eye out for any pests like aphids. Prune off any dead or fading flowers to encourage more blooms. Summer is the season to enjoy the tall, colorful flowers of your hollyhocks in full bloom.
Fall Preparations
As the weather cools down in fall, it’s time to collect hollyhock seeds from mature flowers. This allows you to plant them next year. Cut back the stems after the plants have finished blooming to tidy up your garden. If the hollyhocks look weak, apply a layer of compost or mulch around the base.
This helps them store energy for winter. You can also divide and transplant hollyhocks in fall to give them more space to grow. Prepare for winter while enjoying the last of the flowers.
Winter Protection
In winter, hollyhock plants need protection from frost. After the first hard frost, cut back the plants to about 6 inches. Mulch heavily around the base to insulate the roots and protect them from freezing temperatures.
Hollyhock seeds can be stored indoors during winter, ready for spring planting. Covering the plants with burlap or straw can help shield them from harsh winds. Even though hollyhocks are hardy, a little extra care in winter ensures they’ll bloom beautifully next year.
Troubleshooting Common Issues
If your hollyhocks aren’t blooming, they may not be getting enough sun. Make sure they are planted in a sunny spot. Poor soil could also be the issue, so add compost to improve its quality. Sometimes, hollyhock seeds don’t sprout due to overwatering or poor drainage.
Ensure the soil stays moist but not waterlogged. If the plants appear weak, check for pests or diseases. Regularly inspecting and caring for your hollyhocks will prevent many of these common problems.
Disease Management
Hollyhocks are prone to fungal diseases like rust. If you notice orange or brown spots on the leaves, it’s likely rust. Remove affected leaves and keep the plants well-spaced to improve air circulation. Water at the base of the plant to avoid wetting the leaves, which encourages fungus.
Hollyhock seeds can sometimes carry disease, so make sure you get them from a trusted source. Treat any infected plants with a fungicide and always clean your tools after use.
Pest Control
Aphids, slugs, and Japanese beetles can be a problem for hollyhocks. If you see small insects or holes in the leaves, pests may be the issue. You can wash aphids off with water or use insecticidal soap. Slugs can be handpicked or trapped.
To protect your hollyhock seeds and plants, keep the garden clean of debris where pests hide. Natural predators like ladybugs can also help control the pest population. Regular inspections will keep your plants healthy.
Growing Problems
If your hollyhocks grow too tall and start to fall over, it might be due to weak stems. You can stake them to provide extra support. Sometimes hollyhock seeds may not sprout if the soil is too cold, so wait until it warms up to plant them.
Overwatering or poor drainage can cause root rot, so make sure the soil drains well. If the leaves turn yellow, the plant may need more nutrients. Regular care will solve most growing problems easily.
Companion Planting
Companion planting helps hollyhocks grow better by placing them next to plants that benefit each other. Hollyhock seeds grow well when planted near taller plants, which provide some shade in hot weather. Companion planting also helps reduce pests and improve the soil.
Make sure you give each plant enough space to grow. By carefully choosing plants that support each other, you can create a healthier garden. This is a natural way to keep your hollyhocks and other plants thriving.
Best Companions
Some of the best companions for hollyhocks are sunflowers, delphiniums, and daisies. These plants grow tall and help create a beautiful backdrop for your garden. Hollyhock seeds planted with these flowers create a colorful, lively space.
Vegetables like beans and corn also work well since they add nutrients to the soil. Companion plants should be tall and strong to support hollyhocks as they grow. Planting them together improves the health of your garden and makes it more attractive.
Plants to Avoid
Avoid planting hollyhocks near plants that compete for nutrients, like tomatoes or peppers. These plants need a lot of the same resources, which can weaken your hollyhocks. Hollyhock seeds also should not be planted near mint, as it spreads quickly and takes over garden space. Large, bushy plants can block sunlight, so keep hollyhocks away from dense shrubs. Choosing the right companions and avoiding these plants will help your hollyhocks grow strong and healthy.
Read This Blog: The Surprising Truth: Do Birds Eat Butterflies? Nature’s Delicate Balance Revealed
Advanced Growing Techniques
For more experienced gardeners, advanced techniques can help improve hollyhock growth. Pruning can encourage bushier plants and more flowers. You can also try dividing your hollyhock plants every few years to give them more space.
Hollyhock seeds can be started indoors early to extend the growing season. Fertilizing regularly with a balanced fertilizer boosts growth. These techniques take a little extra time but will reward you with healthier plants and bigger blooms.
Succession Planting
Succession planting helps ensure continuous blooms throughout the growing season. By planting hollyhock seeds in stages, you can enjoy flowers for a longer period. Start by planting some seeds in early spring, then plant more every few weeks.
This way, as one set of flowers finishes blooming, the next set will be ready. Succession planting is a simple way to keep your garden looking fresh and full all season long. It’s an easy trick for experienced gardeners who want more blooms.
Seed Saving
Saving hollyhock seeds from mature plants allows you to grow them year after year. Once the flowers have dried out and turned brown, collect the seed pods. Break open the pods and store the seeds in a cool, dry place.
Label them with the date and year to remember when they were collected. Hollyhock seeds can last for several years if stored properly. This is a cost-effective way to expand your garden and grow more hollyhocks each year.
Also Read This Blog: Nature’s Aerial Mosquito Squad: Do Birds Eat Mosquitoes?
Container Growing Guide
Growing hollyhocks in containers is a great option if you have limited space. Start by planting hollyhock seeds in a large, deep pot. Hollyhocks have long roots, so the container needs to be at least 18 inches deep. Use good quality, well-draining soil, and place the pot in a sunny spot.
Water the plant regularly but avoid waterlogging. Container growing is easy to manage, and you can move the pots to protect the plants from harsh weather. This method lets you enjoy hollyhocks even in small spaces.
Pot Selection
When choosing a pot for hollyhocks, make sure it’s large enough to support the plant’s growth. Deep pots, at least 18-24 inches in depth, are best because hollyhocks have long roots. Hollyhock seeds grow better in pots with good drainage, so look for containers with holes at the bottom.
Clay or plastic pots work well, but avoid small pots that can stunt growth. Choosing the right pot is essential to help your hollyhocks thrive in a container.
Container Care
Caring for hollyhocks in containers is easy with regular maintenance. Water the plants consistently, but make sure the soil drains well to avoid root rot. Hollyhock seeds in containers need plenty of sunlight, so place the pots in a sunny location.
Add fertilizer every few weeks to give the plants the nutrients they need. Prune any dead flowers to encourage more blooms. With the right care, your container hollyhocks will grow tall and healthy, even in small spaces.
Frequently Asked Questions
What is the best month to plant hollyhock seeds?
The best time to plant hollyhock seeds is in late spring or early summer, usually around May or June. This gives them plenty of time to grow before winter.
Are hollyhocks easy to grow from seed?
Yes, hollyhocks are generally easy to grow from seed. They only need well-draining soil, sunlight, and consistent watering to germinate and grow strong.
Why are hollyhocks so hard to grow?
Hollyhocks can be hard to grow because they are prone to rust, a fungal disease. They also need proper support and space due to their tall height, which can make them tricky for beginners.
How do you get seeds from hollyhocks?
To get seeds from hollyhocks, wait for the flowers to dry and form seed pods. Once the pods turn brown, you can collect the seeds and store them for next year.
Do I need to soak hollyhock seeds?
Soaking hollyhock seeds for a few hours or overnight before planting can help speed up germination, but it is not necessary. It’s an optional step to help them sprout faster.
How long do hollyhocks take to grow?
Hollyhocks typically take about one year to bloom. After planting the seeds, the plants grow leaves in the first year and bloom the following summer.
Conclusion
Hollyhock seeds are a delightful addition to any garden, offering vibrant, towering blooms that can brighten up your outdoor space. While they may seem delicate, these seeds are surprisingly resilient, thriving with basic care like good sunlight, well-drained soil, and regular watering.
Although they can be prone to diseases like rust, with the right precautions, hollyhocks can flourish and provide beautiful, colorful flowers year after year. By saving hollyhock seeds from mature plants, gardeners can create a sustainable cycle of growth, making these flowers an affordable and long-lasting part of their landscape.
Whether you plant them in containers or garden beds, hollyhock seeds are a rewarding choice for any gardener, from beginner to experienced.

I am Alexander James, a seasoned professional with 4 years of expertise, brings passion and skill to every project. Elevate your experience with my knowledge and creativity.
![Hollyhock Seeds: The Complete Guide to Success [2024]](https://seederabout.com/wp-content/uploads/2024/10/Hollyhock-Seeds-The-Complete-Guide-to-Success-2024.jpg)


![Hollyhock Seeds: The Complete Guide to Success [2024]](https://seederabout.com/wp-content/uploads/2024/10/Hollyhock-Seeds-The-Complete-Guide-to-Success-2024-300x157.jpg)
